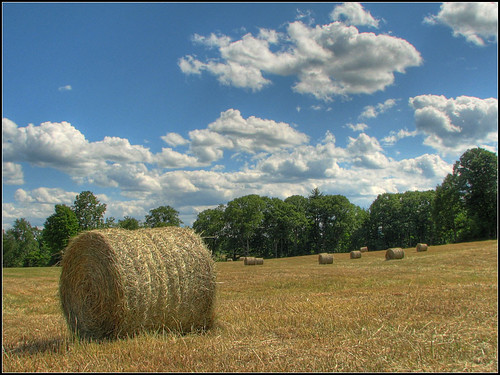
If you are an amateur photographer you have no doubt been disappointed, perhaps many times, by the shot that didn't turn out like you expected. Maybe it was a beautiful sunset that ended up with muted colors. Maybe it was a cloud-filled sky that became completely blown out. Or maybe it was a backlit subject that turned into an undifferentiated, monotone shadow. Each of these examples is a problem of exposure. The subject is either underexposed or overexposed. In the worst case, a single image can suffer from both underexposure and overexposure.
There's plenty of advice on how to deal with exposure problems:
- You can get better at the craft of photography. Many exposure problems can be avoided simply by developing your technique.
- You can buy more expensive equipment. All cameras are not created equal. Your $250 compact digital camera is not as capable as an $800 DSLR. For example, the DSLR probably has a better sensor with a higher dynamic range. And a DSLR lens can accept a wide range of filters that might improve your exposures.
- You can just avoid backlit subjects and other tricky lighting situations.
Number 2, "buy more expensive equipment," is decent advice if it's important to you and it's in your budget. However, there are limits to even the best equipment. The dynamic range of the human eye is significantly better than the best camera. In fact, this discrepancy is the source of much disappointment. Your eye sees a beautiful high-contrast scene, you snap a picture of it, and your camera -- even the best camera -- simply can't handle it.
So those who have overestimated the benefits of Number 2 often shrug their shoulders and suggest Number 3, "avoid backlit subjects and other tricky lighting." The trouble is this is the one bit of advice that is really bad. There is another approach to handling tricky lighting; it's called High Dynamic Range imaging (HDR or HDRI).

HDR is really a two step process:
- Step 1: When you capture the image, you make multiple exposures of the same scene. You'll need a good tripod for this. Just set your camera on the tripod and take 2 to 5 shots at different Exposure Values (EV). In fact, many cameras have a feature called Auto-Exposure Bracketing (AEB). AEB makes this step very simple.
- Step 2: After you've loaded the exposures on your computer, you use special software to combine the exposures into a single HDR image. The HDR image stores the complete dynamic range of all the source exposures. HDR software can use this information to produce an image that is more faithful to what your eye perceived in the first place.
My real object in writing this is to share the fun I've been having with HDR. All the accompanying images were created from multiple exposures made with my Canon PowerShot S2 IS camera. I used Photomatix to create the HDR images (again, there are other software options besides Photomatix). For more HDR samples you can check out my HDR set on Flickr. I still have a lot to learn about HDR, but I'm really enjoying having one more photographic technique up my sleeve.
